Adding a gothic arch to your bra band is a must if you find the conventional straight band rides up or is generally uncomfortable. Or if you just prefer the look of it. So here’s a little guide for how to sew a gothic arch – the way I do it, at least.
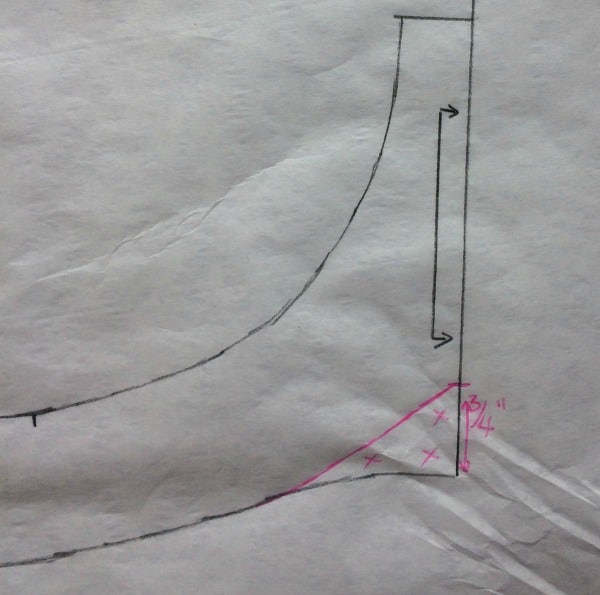 The first thing you’ll need to do is alter your bra pattern. Measure up approx 3/4″ (2cm) from the bottom edge of the front frame. A touch more if you want a more dramatic arch, a touch less for smaller sizes. The important thing is to make a sharp angle at the centre front – otherwise it’s just an arch. Not Gothic. The other important thing is to smoothly blend the line back to the curve under the cup holes (almost certainly there is a more technical term …)
M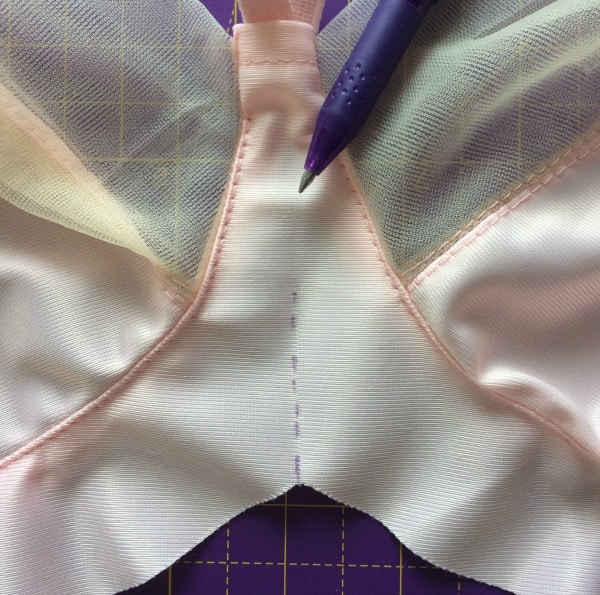 ark the centre line on the front frame. I love Frixion pens for marking fabric because you can get nice fine marks that disappear easily with the iron.
Yes, I know the ink can reappear in the cold but since I never put my bras in the freezer (and certainly never while wearing them!) it’s not something that’s ever worried me.
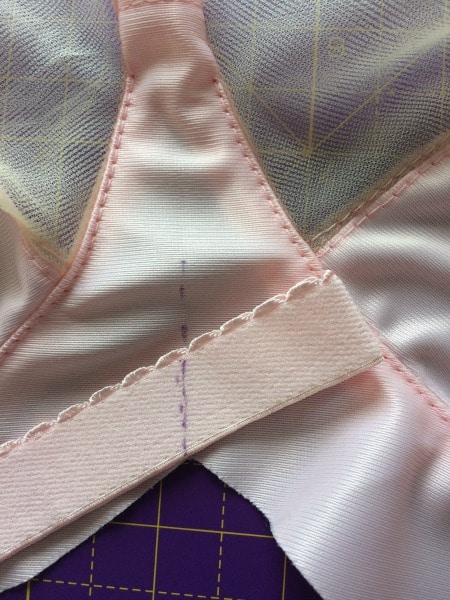
Then fold the bottom band elastic in half with the plush side facing you and the fancy edge to the left.
Line it up with the bottom edge of the frame so that the fold extends into the cup seam.
 Machine-baste the elastic along the marked line. Open the elastic out and position the machine-basting along the centre line on the frame. Pin in place either side of the centre.
I like to start the first pass of zig-zagging on the left side of the band, sewing from the centre point to the hook & eye point of the back band. I use the firm band elastics in my findings kits and so I don’t need to stretch the band as I sew – I just put a little bit of tension on it, particularly under the cups.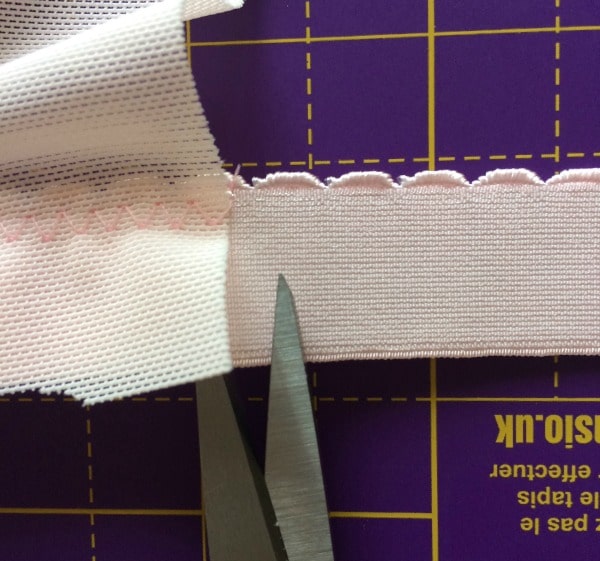
Trim the excess elastic flush with the end of the back band.

To make sure that both sides of the band are equal, take the bit you just trimmed off and use it as your template to trim the other end of the elastic.
This next bit is the part most of my students find the hardest to fathom – until they do it!
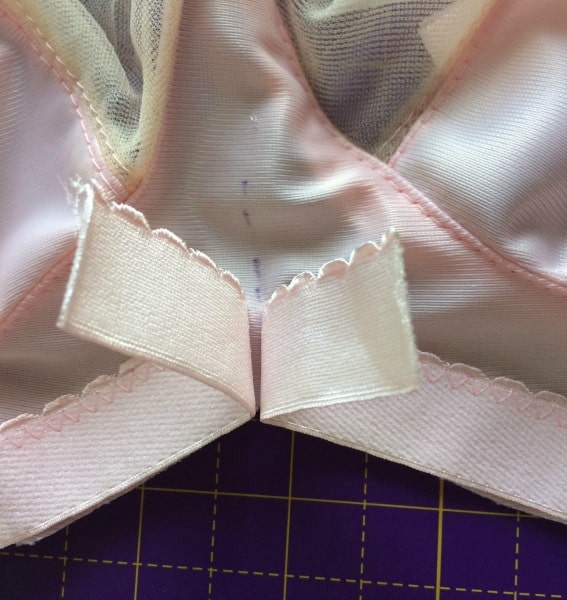
Pull out the machine-basting from the middle of the elastic. Cut it at the fold.
This leaves two little tails sticking up.

Now flip the bra over and clip at the centre just shy of the stitching. This is important – the next bit won’t work otherwise!
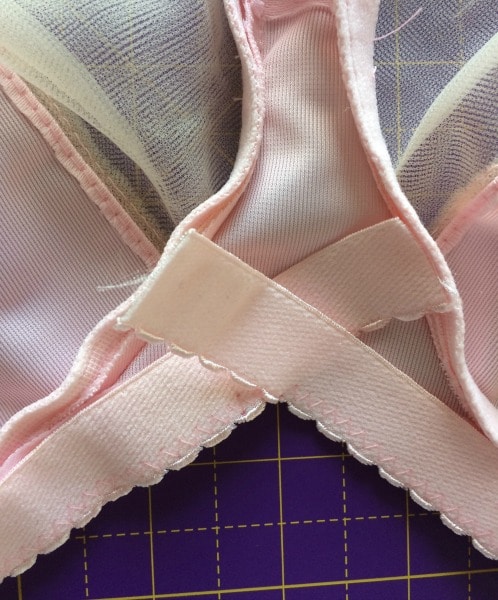
Turn the bottom band to the wrong side, ready for the second pass of stitching. The little tails should pass over each other and lay flat. Use the original marked line to help you align the tails and pin them in place.

Sew the second pass from end to end, pivoting in the centre.

All done! Just a quick press with the iron to remove the Frixion pen marks.